Basic Beading Techniques
With these 2 basic beading techniques, using 3 basic jewelers tools you will go from beading nothing to beading something. Trust us, if we can so can you!
If you want to create basic stringing projects these two simple techniques are all you need to learn. You will be mastering these techniques in no time. Once you understand how to create the two basic beading techniques, combine that skill using the various selection of basic jewelry making supplies, you will be creating countless jewelry projects.
Learning these basics and becoming more comfortable as you practice them anchors the foundation and provides you with solid footing to build on.
But you must first start with the basics.
This will be an overview of the 2 basic beading techniques that will be used when you are ready to move onto the beading tutorials.
After the basics we'll then expand beyond the basics, but first things first.
Continue to move forward. Review if needed. The further you progress the clearer this will become. Both of these basic beading techniques will not change, how you use these techniques may.
The basics are the basics.
Okay, let's bead-gin...
Basic Beading Technique...Crimping
Necklaces; Bracelets; Anklets; Earrings; Purse Handles; Bookmarks...
Crimping is the process of compressing a crimp bead to hold all the components of a piece of jewelry together, keeping the beads from falling off.
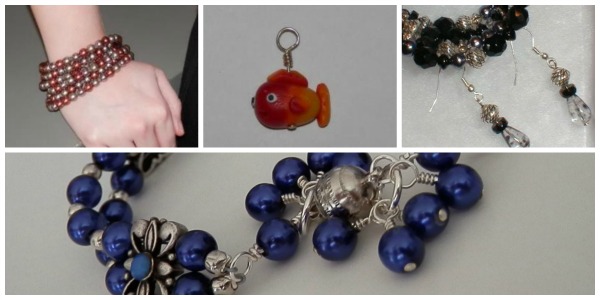
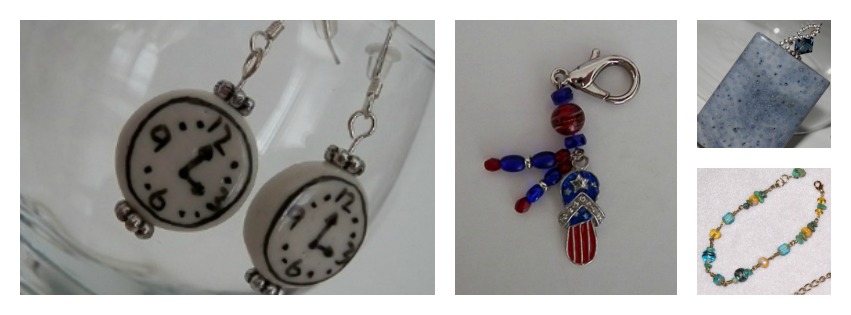
Pictured here are examples of items created by using the crimping technique. Necklaces, bracelets, anklets, brooches are just a few examples.

There are many more designs using the crimping technique that we will explore once the basics are understood.
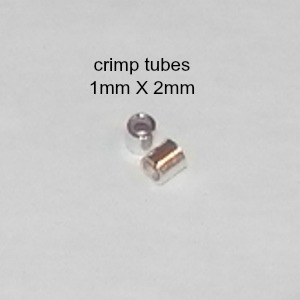
As you will learn when we move into jewel making supplies, a crimp bead is a type of pliable bead which defines it as a noun, a thing.
But as a beading technique, 'crimp-ing' is an action of compressing that pliable bead and is an action word, a verb.
So the word crimp is both a noun and a verb.
The noun...crimp is the thing, a pliable bead.
The verb...crimp is the action of compressing the pliable bead.

[Just a little distinction there, I found this helpful and hope you do too. Thank you for your patience with my over detailed information.]
Ok let's get back to topic...
Crimping is the single thing that holds your it all together.
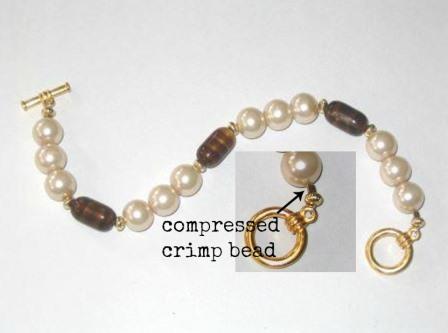
A compressed crimp bead holds the beads onto the flexible beading wire along with the clasp...all at the same time.
That seems like a lot of work for one little pliable bead to do. Don't you think?
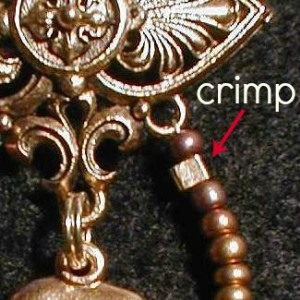
Here is just a bit more visual to help clarify and anchor this concept of what I feel, is a very important aspect to jewelry making and the basic beading techniques.
A Crimp - Noun
The pliable bead.
Crimping - Verb
The compression of the pliable bead.

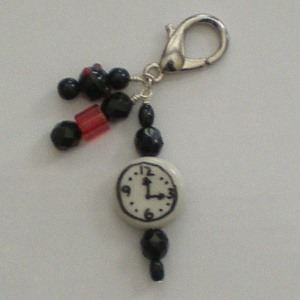
Here is one more view of a compressed crimp bead at work. This single and solitary pliable bead is holding everything in place.
That is pretty amazing, I think.
As you move forward through the process and eventually begin your beading projects we'll discuss more on crimps then and make a few recommendations for you to consider.
Here is the tutorial, 'my first necklace' to view the process if you feel it will bring more clarity on this beading technique.
I do recommend, before you begin making your first piece to finish reading the basic beading topics; basics beading techniques [which is where you are right now], and the 3 basic jewelers tools page as well.
But for a sneak preview as to what you will be doing, feel free to check it out. Just promise yourself to come back and finish the basics.
The next technique.
Basic Beading Techniques...Single/Plain Loop
Earrings, Links and Charms...OH MY!
The single or plain loop is most commonly known for creating earrings. But this basic beading technique is not for earrings only.
You will use this technique also to create charms, link jewelry, pendants and a variety of others items.
When creating earrings or charms you must first create a dangle.
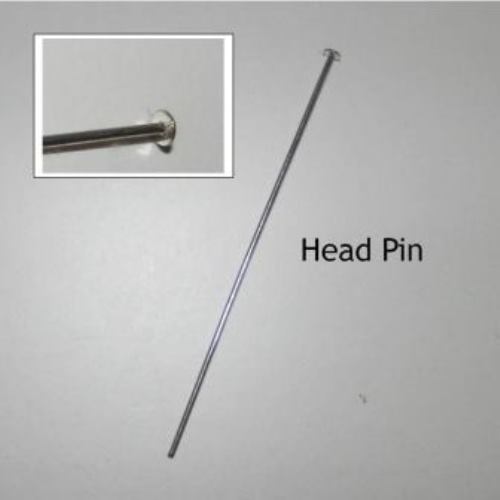
This is done by using beads and a finding called a head pin or eye pin. The head or eye of the pin is intended to hold the beads in place.
Beading Tip:
If the hole of your bead is larger than the head or the eye of the pin then a smaller bead must be strung first onto the pin to keep your bead from falling off.

Closing the pin off at the opposite end with a loop will hold the beads in place with no fear of the beads falling off.
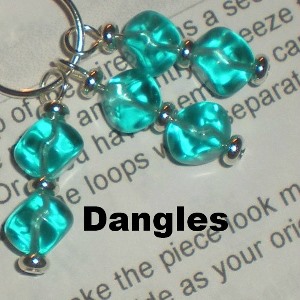
Once the dangle is created, by attaching it to another finding of your choice will complete your intended project.
Design Ideas Using Dangles
Attach a dangle to an earring wire...
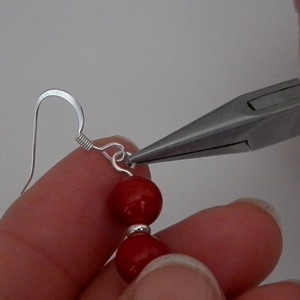
...You create a pair of earrings.
Attach a dangle to a lobster claw...
...You create a zipper pull or purse tassel.
Attach a dangle to a bracelet...
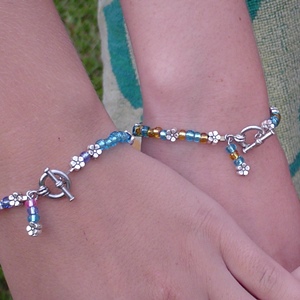
...You create a charm for your bracelet.
We think you get the idea? One more thing...
The Single Loop vs. The Wrapped Loop
There are two different type of loops that you will learn to create. A single/plain loop and a wrapped loop.
In the basic beading techniques class you will learn the single loop and sometimes called the plain loop. But the other type of loop, we will cover once you reach beyond the basics, is called a wrapped loop.
I teach the single or plain loop for beginners because I feel it is easier. [Some differ in opinion.]
I want you to learn both, but I would like you to first grasp the concept of making a single loop with the head or eye pin and get your hands accustom to the movement.
You will learn both techniques and learning both with broaden the supplies you will use.
Here is an example of the difference between the two loops.
Single or Plain Loop
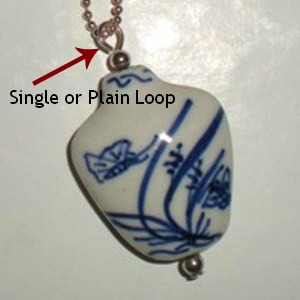
Wrapped Loop
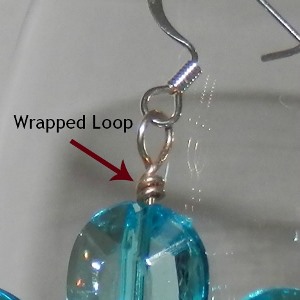
See the difference?
Here is the earring tutorial when you are ready to move on but again make sure you have read all the 'Basic Beading' pages as stated earlier. This is just a quick reference.

Where To Go From Here?
Okay if you are following in order you should have been through 3 basic jewelers tools and you just finished the 2 basic beading techniques.
Now it's time to learn how to make jewelry.
Begin with 'my 1st necklace' it will take you step by step through the anatomy of jewelry, beading supplies, the specific tools and finish with the beading tutorial.
It's not as long and tedious as it may sound and I feel it is all worth the exact process I lay out for you. This is how I conduct my classes and that is what I am trying to provide for you here.
So hurry on now and let's get you started.
I'll look forward to sharing more with you there.
One last word of encouragement...
If you might be feeling confused I encourage you to continue reading and move through the whole process of the beading basics seeing the visual process first.
It's like putting a puzzle together and you need to see all the components, or puzzle pieces, before you see the big picture.
Once it clicks...it sticks.
But if you are feeling a bit overwhelmed with ALL the information then take a break. Step back, get a beverage and breath for a moment.
Digest what you have read this far, then come back and continue.
I have tried to put it in simplest form for you but it is still a lot of information to consume.
You are also invited to contact me if you have any questions.
Sometimes we may just need a little reassurance to get us to the next step.
I did as I went through the process. Believe me it was not in this nice neat order either. I want to make sure you understand there is someone on this end that will help you with this.

When you are ready, move onto 'my 1st beaded necklace' and we'll see you there.

Available Now at Amazon.com
The step by step book that shares a quick path to begin your beading journey.
Use 3 tools and 2 techniques to take you from beading nothing to beading something.
Bead At Home Swag
"My Birthday Rocks!"

This and more available now at Bead At Home Store
Recent Articles
-
Inspire Jewelry Making Ideas
Aug 16, 21 08:46 PM
 Inspire jewelry making ideas with 5 ways from day to day life just by opening your eyes and looking around you.
 -
Scrabble DIY Jewelry
Jul 09, 21 03:33 PM
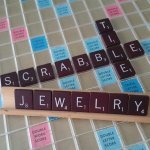 Scrabble DIY Jewelry celebrates Scrabble Day April 13 with easy to make jewelry.
 -
What is Beading?
Jun 23, 21 02:13 PM
 What is beading? Learn and understand different aspects to beading to narrow your search for what you want to learn.
Jewelry Making Classes Online

- Home
- Basic Beading Techniques
This site contains affiliate links to help keep our community free to you. Bead At Home and Beading Jewelry 101 may earn revenue based on affiliate relationships and advertisements with partners including, Amazon, eBay and Google. There is no additional cost to you and it helps us continue to offer this content free to our community. Thank you for your consideration in supporting our efforts.
Copyright© - Bead At Home / Beading Jewelry 101 - All Rights Reserved