Basic Beaded Bracelet
Let's uncover the basic beaded bracelet step by step process leading you ultimately to the 'how to' tutorial where we create this project.
Along the way we will work through each step to ensure your success and build your confidence to easily move to each new project. Here is what we cover.
Bracelet Making Supplies
We'll look closer at the essential supplies needed for the basic beaded bracelet project. Only four components make up the supply list.
- decorative beads
- beading wire
- crimp beads
- clasp
Simple enough? We will look at each in more detail. Next up...
Jewelry Beading Tools
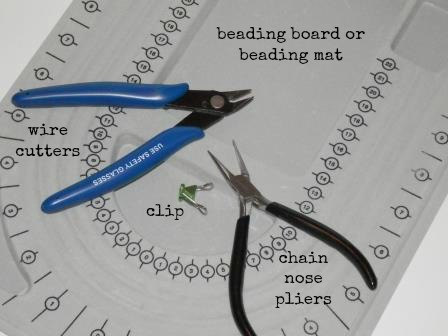
In this section we discuss the jewelry beading tools needed for this project. There are only 3 tools needed for any of the beginning projects. Once we have finished we will move directly to the next section and put the supplies and tools to use learning...
How to Make a Bracelet
The 'how to' will be your last stop on your journey learning how to make your first basic beaded bracelet. We will walk step by step through the entire process.
If you should have questions by the end of the process write them down and reach out.
If you are ready to move forward then let's continue by starting the process with first understanding the anatomy of a bracelet, unfolding the construction.

Jewelry Anatomy 101
Basic Beaded Bracelet
Jewelry Anatomy 101 is a course, or more of a concept, created for students attending the basics to beading classes we hosted. It evolved from our learning process. We found after many years of teaching the basics that this visual instruction of the construction helps to lift the fog and pull back the curtain of this simple process.
Think of it as a science project where we dissect and study the inside of each specimen down to it's basic core. In our case, a basic beaded bracelet. Once you learn the guts to the process you will never look at jewelry the same way again, you will see it with new eyes.
[Side note: We were never good in science but maybe if we had gotten to dissect jewelry rather than frogs we may have done better.]
By the end, you will see the simplicity of jewelry making instead of what may appear to be the complexity of it.

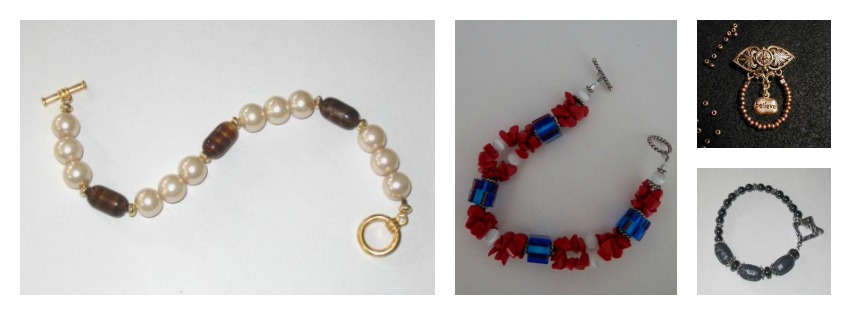
Let's begin with a little exercise. We encourage you to make some notes so we can compare at the end. When you look at the beaded bracelet, pictured here, what are some of the things you notice? Take a moment to consider. It's not a trick question and there are no right or wrong answers.
We want you to exercise what your brain registers from what your eyes see. Pause for a moment here before you continue reading. We aren't in a hurry, take your time.
Here's a hint, we're looking at things like:
- The Beads
- The Design
- The Color
- How is it closed
Do you see it? What did you come up with?
Now let's take a closer look at our basic beaded bracelet and discuss it.
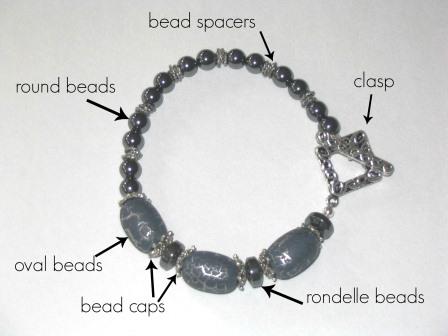
Let's compare notes:
- It's a bracelet.
- The color is grayish black or a charcoal gray with silver metal accents.
- The beads are a variety of shapes and sizes.
- The closure is a decorative clasp in keeping with the design of the bracelet.
- The style of bracelet is casual.
- The pattern is asymmetrical.
Is there anything else you noticed about this piece of jewelry that didn't make the list?
Now let's ask, if that's what you are seeing from the outside of the bracelet, have you ever wondered...
- What the beads are strung on?
- What is holding it together?
How do you go from this...
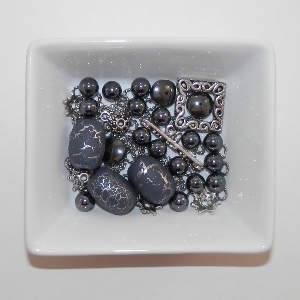
...to this?
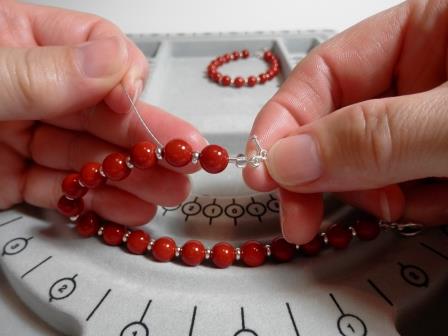
Let's look inside and see what's going on underneath the pretty beads that holds this piece of jewelry together. You may know that a stringing cord is what the beads are strung on, but do you know what type of beading cord it is? We need to ask...
- What are these beads strung on?
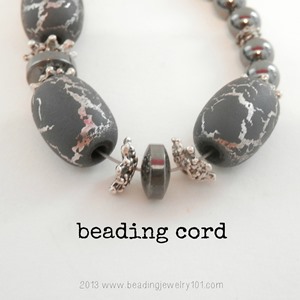
There are a variety of choices of stringing materials based on the project and we'll talk more of those choices as we work through other tutorials. But as a beginner when learning how to make your first bracelet we begin a stringing material called 'beading wire'.
Our beading wire of choice for beginners is a brand called 'Soft Flex Beading Wire'.
This is a 'been there, done that' opinion. When we were finally introduced to this soft flexible beading wire nothing else compared from what we had been using. It was as different as night and day. We found it to be the easiest material to use when first beginning to make jewelry. Learning from the beginning doesn't mean we have to compromise on quality. Learn it the right way from the start saving time of having to re-learn it later.
If you walk away with any tidbit from this page we encourage you to make this it. Of course we want you to take all our suggestions into consideration and ultimately the choice is yours but we couldn't continue without sharing that secret tip we learned.
We will share that it does cost a little more than the lower grade beading wires but we are confident that what it saves you in frustration and provide you hours of pleasure through this learning process will make it worth the cost.
Beading Tip:
Not All Beading Wire is Created Equal
We found this out the hard way.
Read more on why we love Soft Flex Beading Wire and why you will want to make this your beading wire of choice as well.

Let's move on to the next question...
- What is holding the bracelet together?
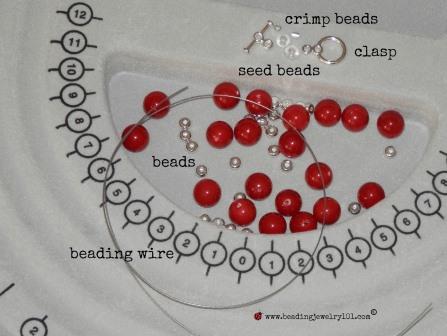
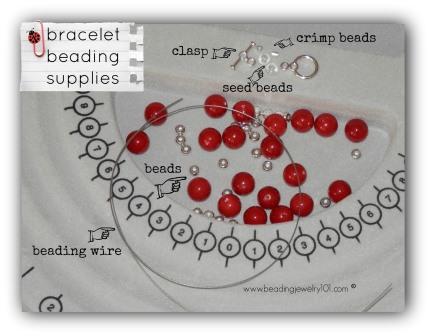
Shall we take a closer look? Stated earlier you need only 4 basic components to create a basic beaded bracelet.
- beading wire
- clasp
- crimp beads (plus) seed beads
- decorative beads
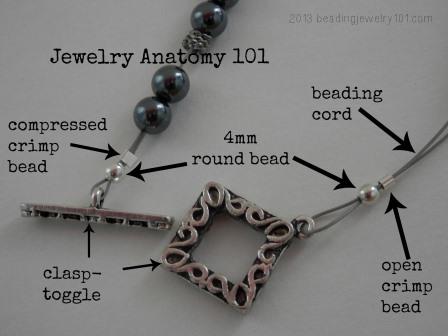
This visual shows all the components in use for either a bracelet or a necklace or even an anklet.
Each are constructed in the same manner, the difference is the length of each style. If you look at the small components closest to the clasp, that needs to be your focus as you proceed with this process. These are the key ingredients for holding the jewelry together and we'll talk more on that in the 'how to' tutorial.
If you are ready, let's move on learning how to make a basic beaded bracelet. Our next step is to discuss the components on the next page where we cover supplies.
Let's get clarity what each component is, how to use them and the purpose for each. Head on over to bracelet beading supplies by clicking this picture below. We'll see you there.

Available Now at Amazon.com
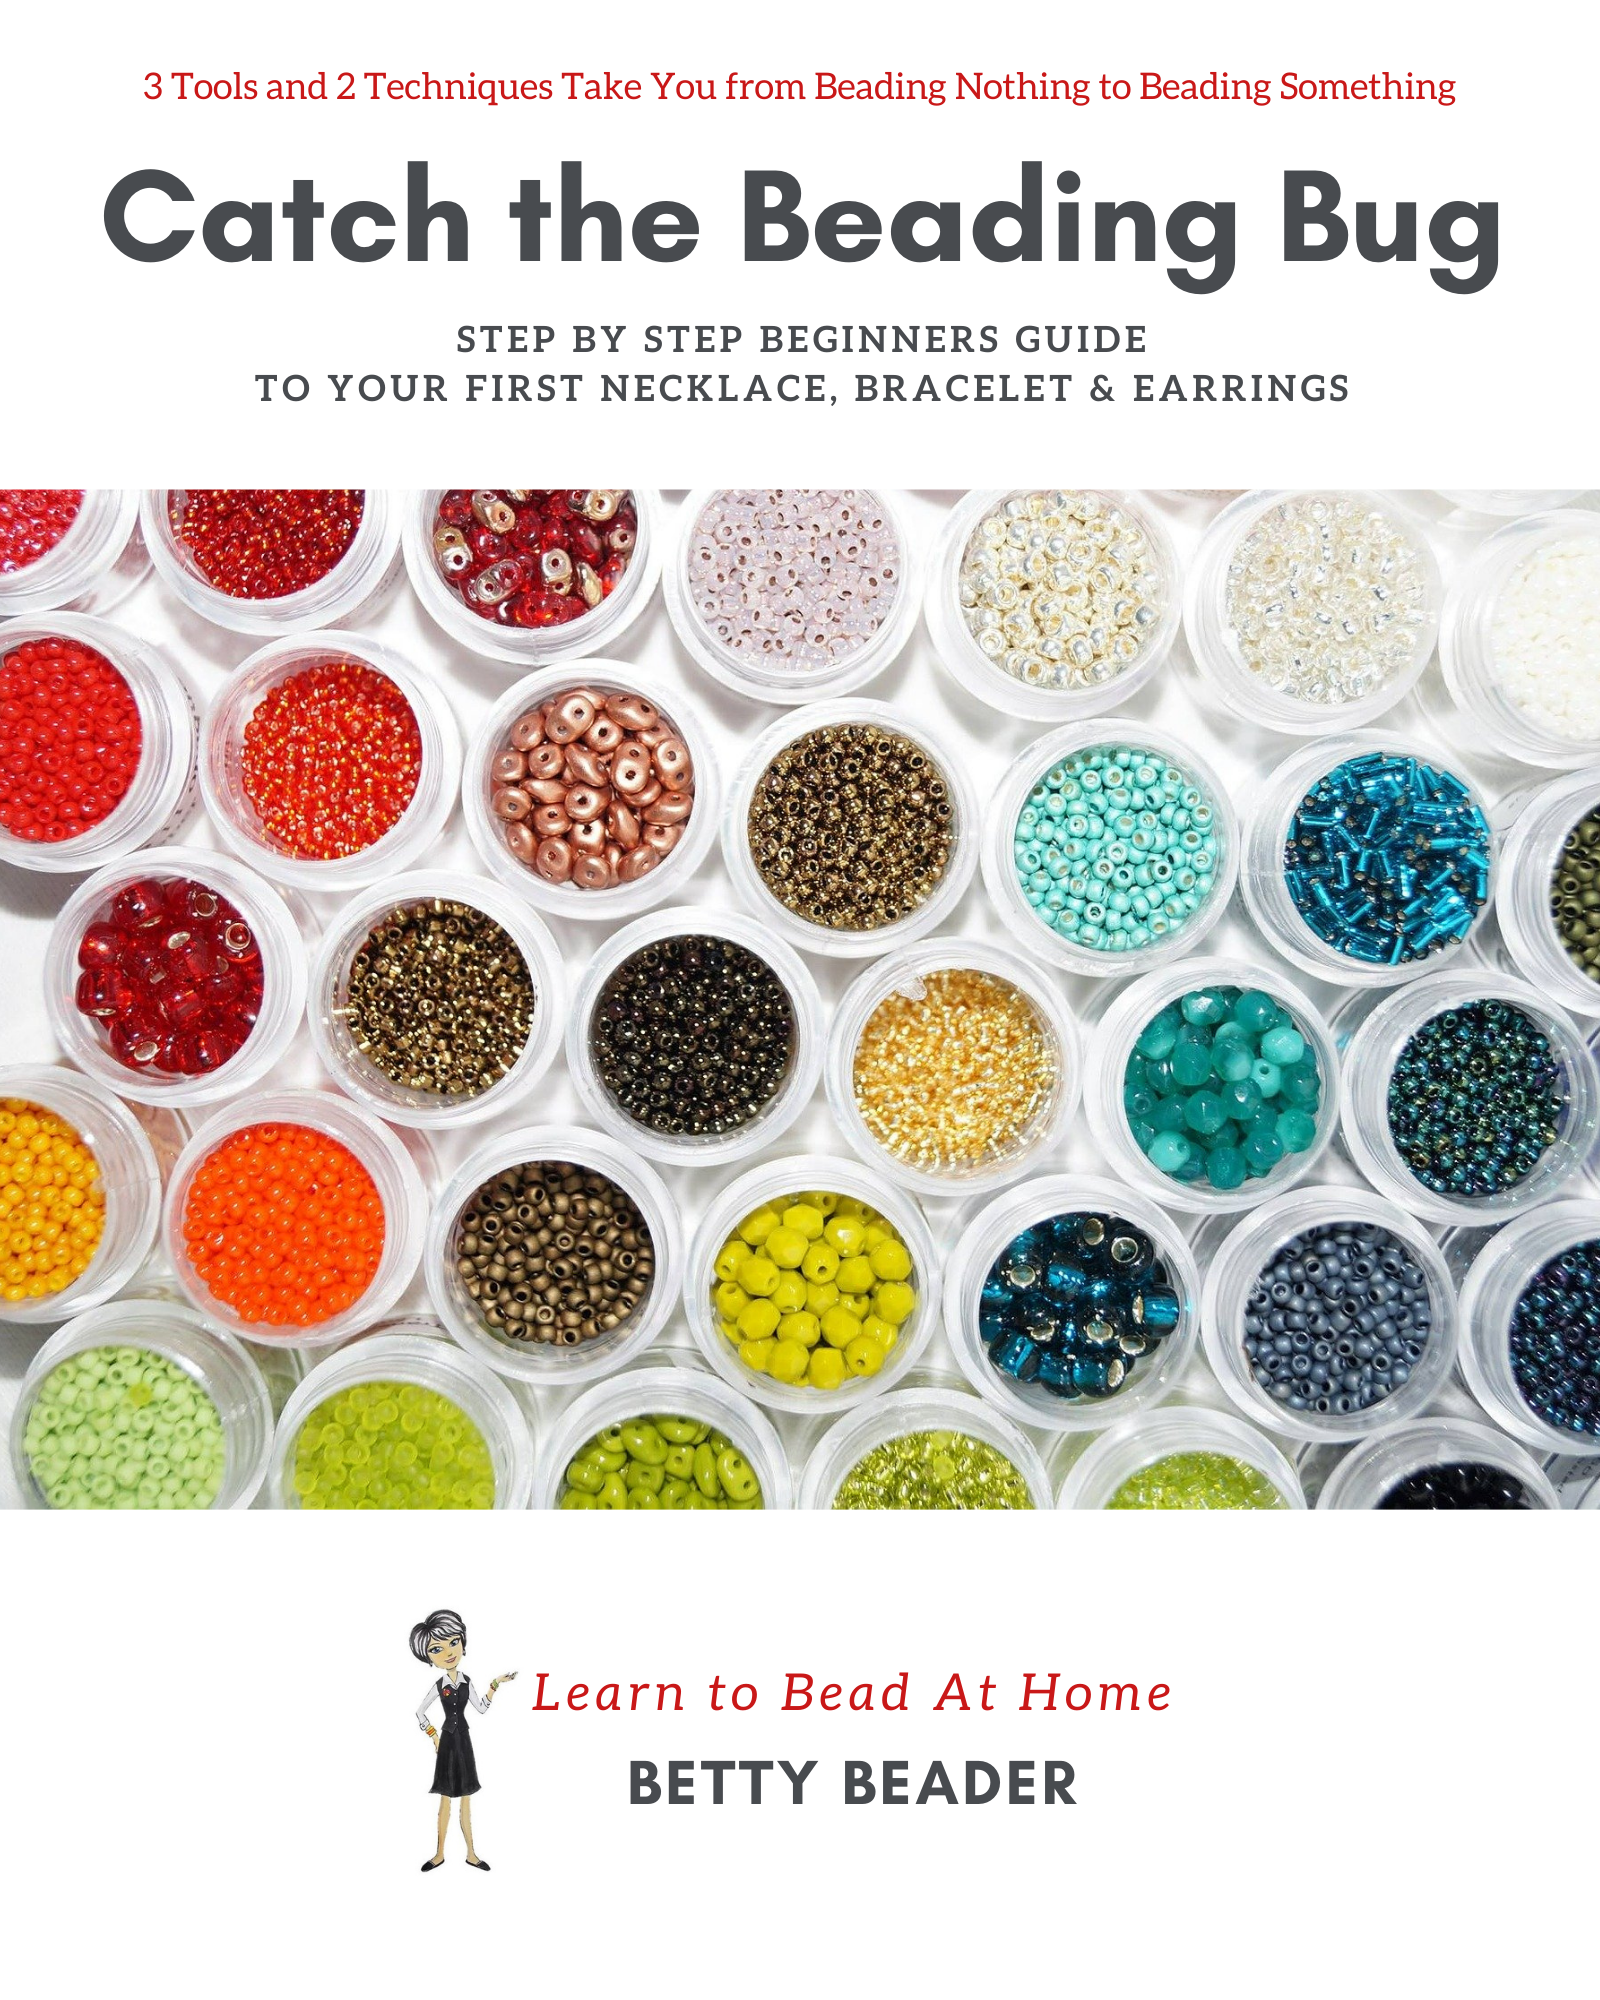
The step by step book that shares a quick path to begin your beading journey.
Use 3 tools and 2 techniques to take you from beading nothing to beading something.
Bead At Home Swag
"My Birthday Rocks!"

This and more available now at Bead At Home Store
Recent Articles
-
Inspire Jewelry Making Ideas
Aug 16, 21 08:46 PM
 Inspire jewelry making ideas with 5 ways from day to day life just by opening your eyes and looking around you.
 -
Scrabble DIY Jewelry
Jul 09, 21 03:33 PM
 Scrabble DIY Jewelry celebrates Scrabble Day April 13 with easy to make jewelry.
 -
What is Beading?
Jun 23, 21 02:13 PM
 What is beading? Learn and understand different aspects to beading to narrow your search for what you want to learn.
Jewelry Making Classes Online

- Home
- My 1st Bracelet
This site contains affiliate links to help keep our community free to you. Bead At Home and Beading Jewelry 101 may earn revenue based on affiliate relationships and advertisements with partners including, Amazon, eBay and Google. There is no additional cost to you and it helps us continue to offer this content free to our community. Thank you for your consideration in supporting our efforts.
Copyright© - Bead At Home / Beading Jewelry 101 - All Rights Reserved