Beaded Necklace Tutorial
Welcome to your first beaded necklace tutorial. Here you will learn the step by step process to create one of your first pieces of jewelry, for beginners.
We like to start you with a necklace, introducing the concept of the 'crimping technique', one of the two important beading techniques we will learn.
The crimping technique will also be the technique used for the 1st bracelet tutorial.
Necklaces, however, have standard measurements based on the length of your personal chose. Whereas bracelets vary in sizes, based on an individual's wrist, and may need slight adjustments for a custom fit.
So let's begin with a beaded necklace to get you started. Once you learn the concept of stringing and closing a piece of jewelry then you can apply that knowledge and build in any adjustments for learning bracelets.
For your convenience here is a chart we find useful to have on hand;
Average Necklace Lengths
- Choker - 16 inches
- Princess - 20 inches
- Matinee - 23-27 inches
- Opera - 32-37 inches
- Rope - 48 inches
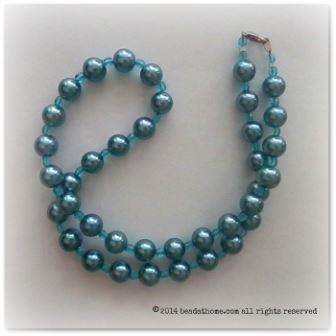
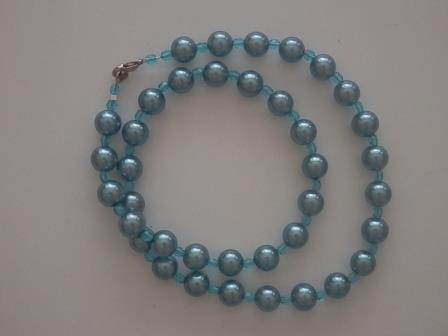
Our necklace example is 20" in length.

Quick Tool Recommendation: The chart and other useful quick references we discuss is found on this business card-sized handy chart card. Having it right at your fingertips allows for easy access anytime. Keep one handy for all your calculations. It's a perfect little tool to add to any beginning beading tool kit. This is available at Amazon.

Beaded Necklace Tutorial
Step 1: Prepare Your Project
Begin by laying out the beads in a pattern. This is the repeat pattern.
Continue laying out the beads until you have the approximate length you desire.
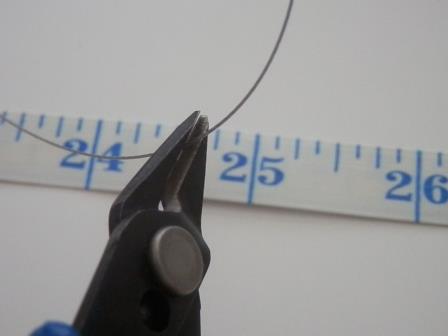
Measure and cut your stringing wire. Add 5" to 6" of extra wire to your anticipated finished length. You will need this excess to hold the clasp and have extra wire to tuck inside of the beads that sit closest to the clasp. I have planned for a 20" necklace so my cut is 25".

Keep a pretty little retractable measuring tape in your beading kit stash for measuring beading wire. They are soft to the touch and so handy to have. We find it helpful to keep a few on hand with our beading supplies, our bedside nightstand and we always carry one in our purse. You just never know when you will need it. This is also available through Amazon.

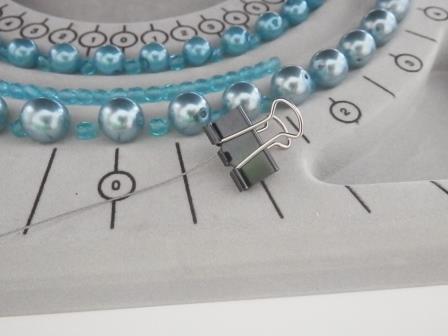
Temporarily close one end of the stringing wire with a bead stopper. We have used an alligator clip.

Bead Buddy Brand offers this package of 8 sturdy bead stoppers. You will find an assortment available online. These specific grippers make for an easy hold, especially when taking the bead stopper on and off, and provides a firm grip on the flexible beading wire.
Step 2: String Your Beads
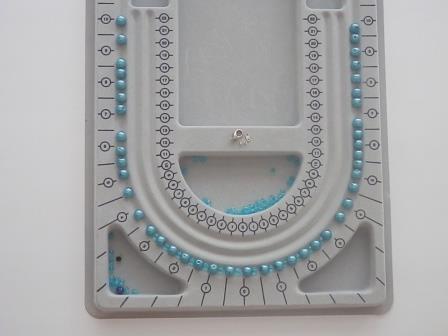
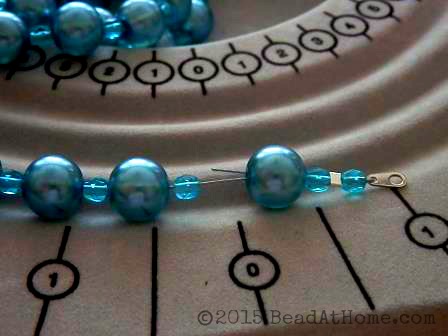
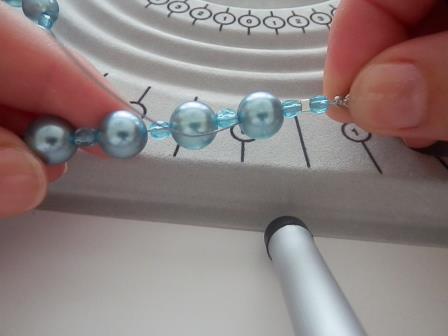
Begin stringing beads onto the beading wire.
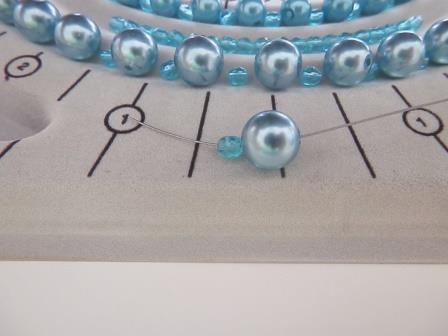
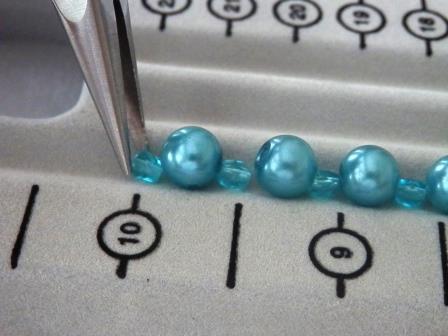
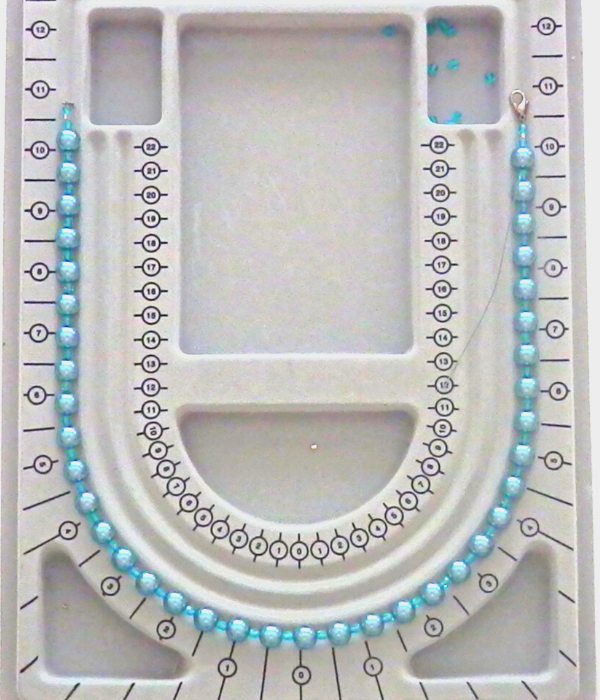
Double check the length of your piece against the measurements of the beading board markings. Have enough beads been strung on the wire?
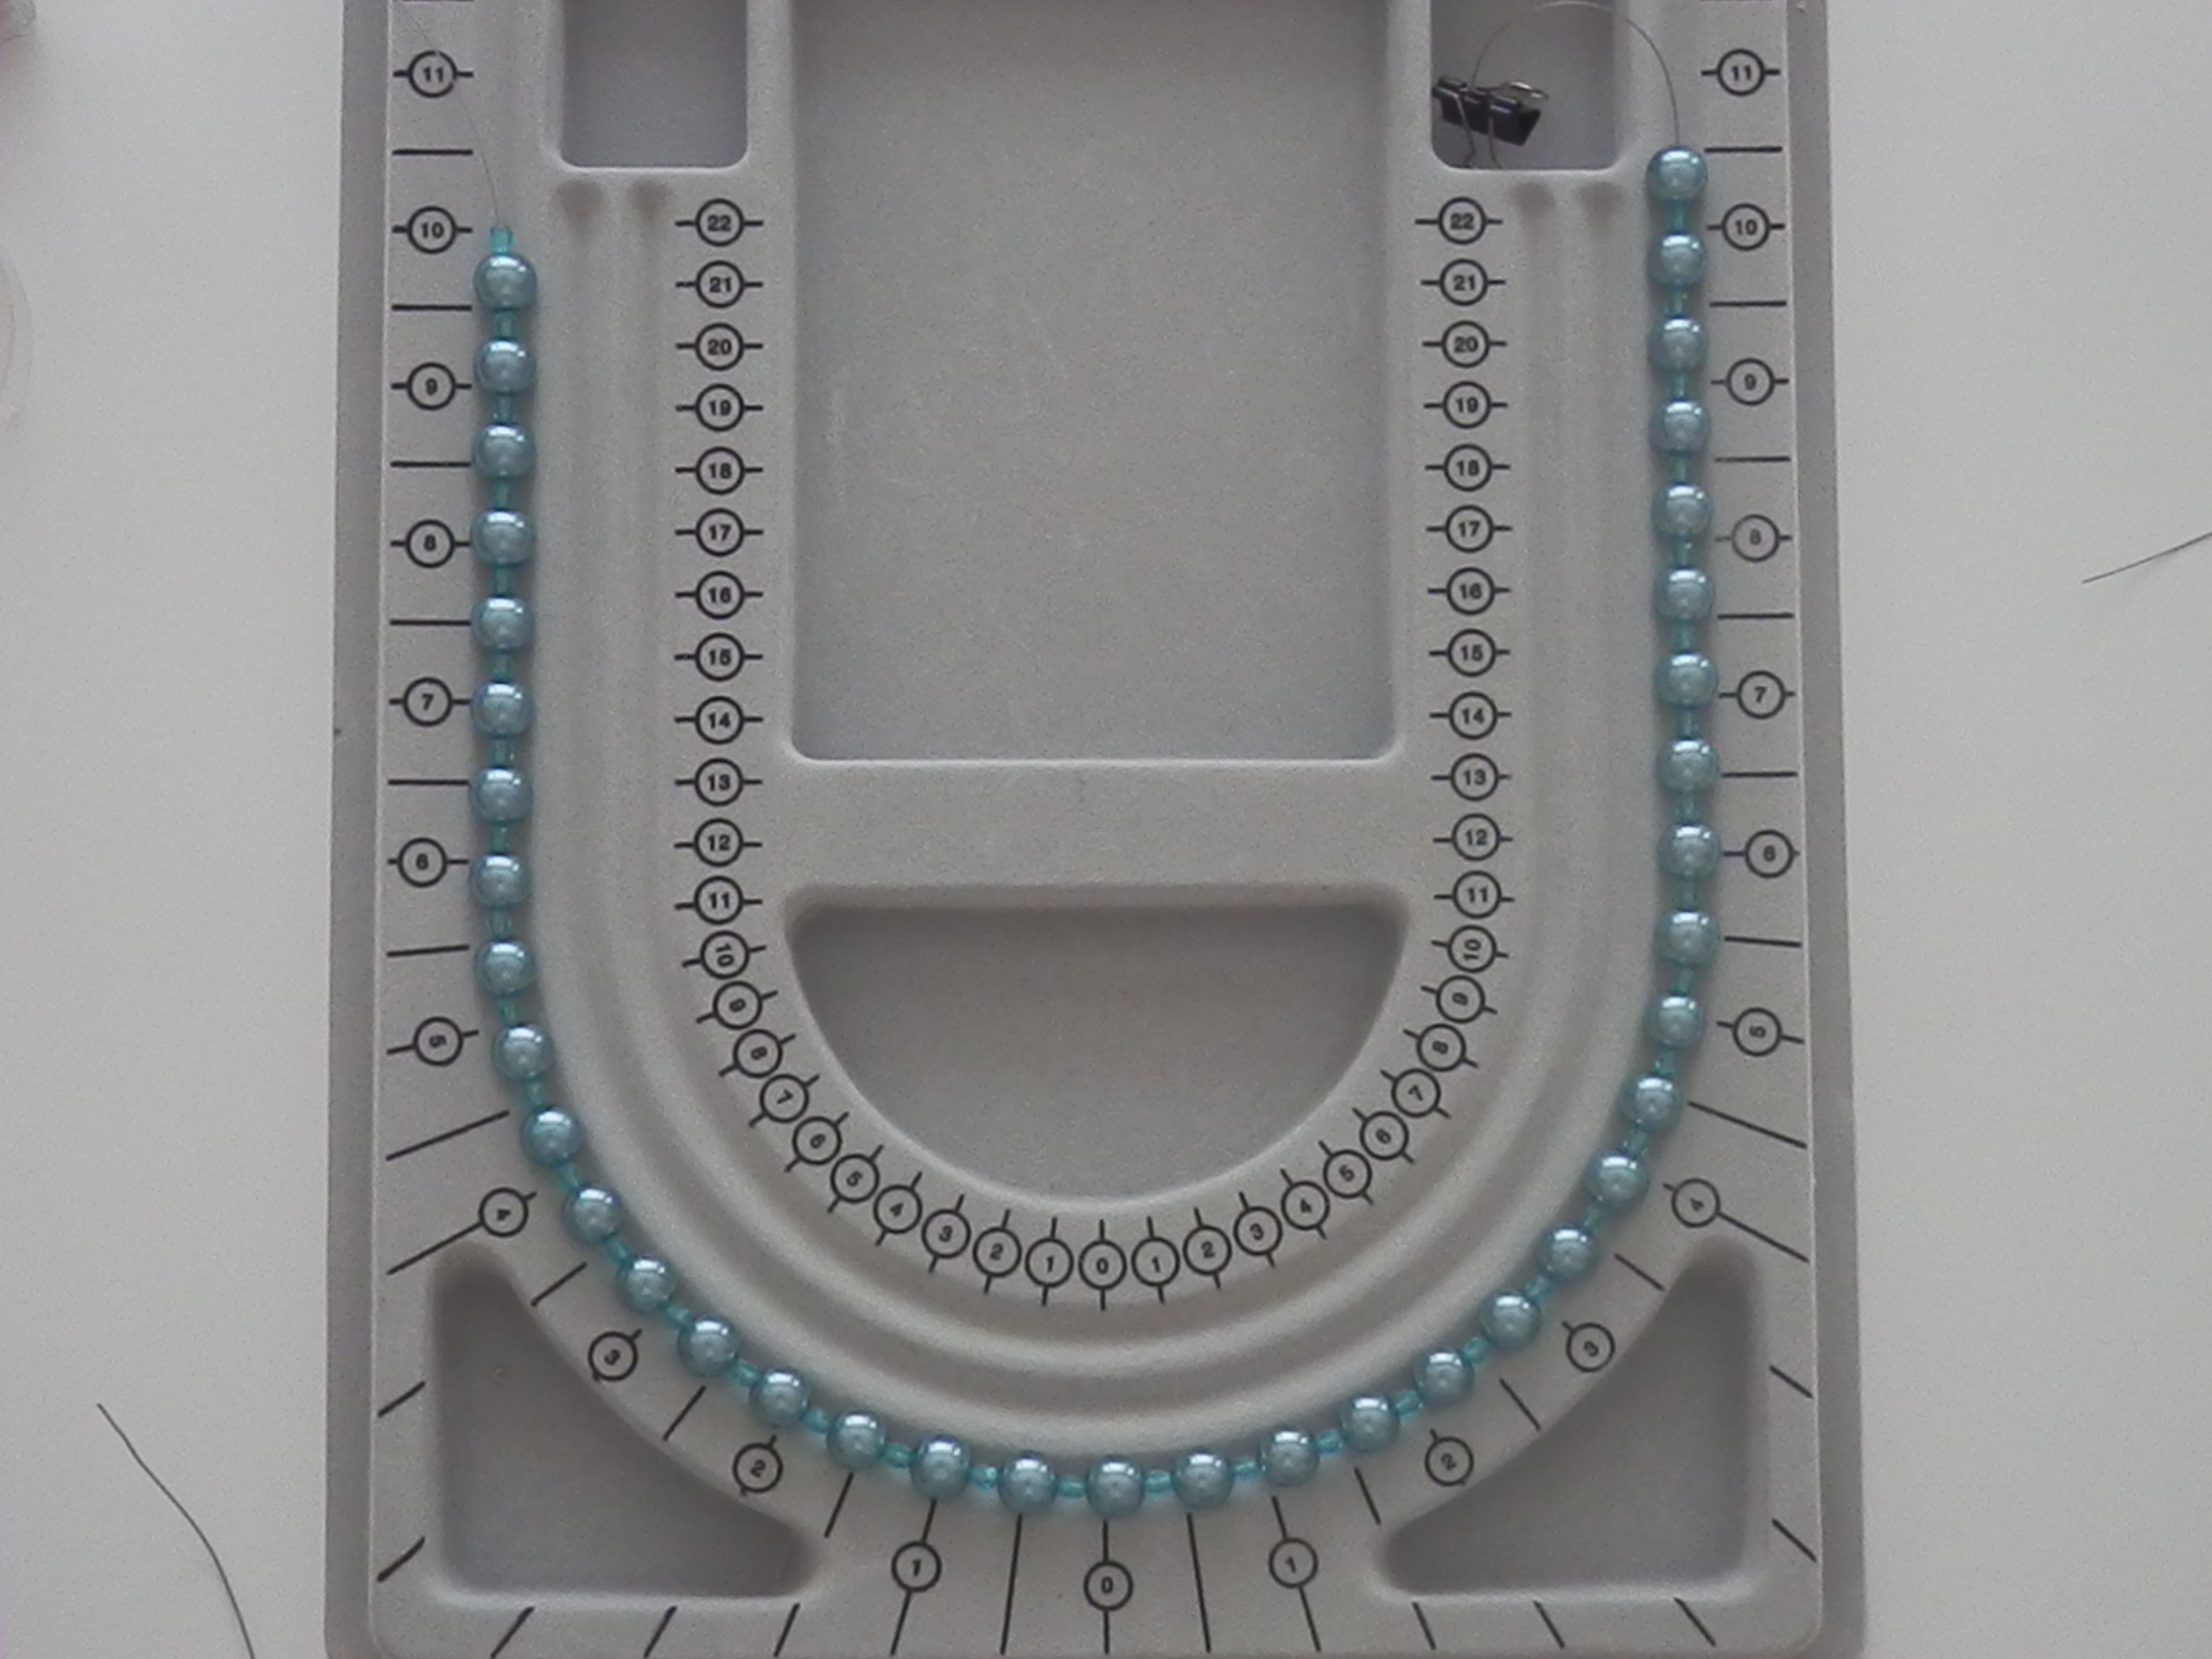
This grey flocked BeadSmith Bead Board has an attached cover, 6 recessed compartments and measure 9.75 x 13.25 inches. These bead boards are handy tools to keep in your beading stash. You will lots of uses for the beading boards and multiples stack efficiently to conserve on space.
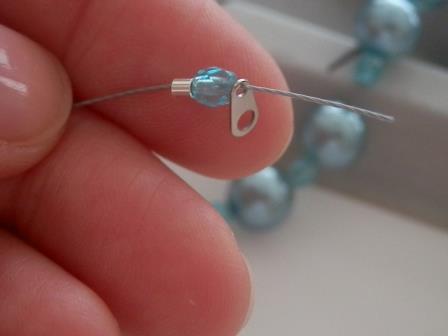
Step 3: Close The First End
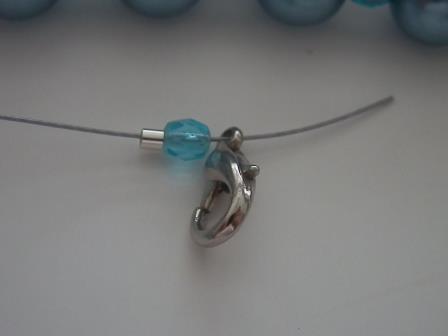
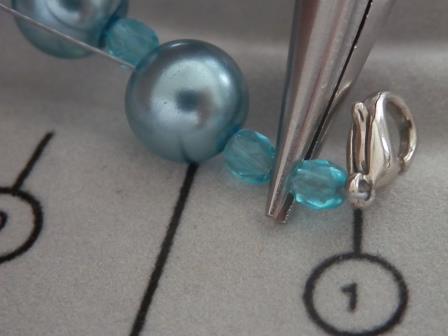
Begin by stringing the crimp bead, a small 4mm or seed bead and then the first part of the clasp. It does not make a difference which clasp part is attached first for a basic repeat design.
Next...bring the stringing wire back through the small bead and the crimp bead, creating a loop to hold the clasp in place. Leave a tail of approximately 1" of the stringing wire. It is very important at this stage to conserve as much of your wire for the ease of working with the opposite end.
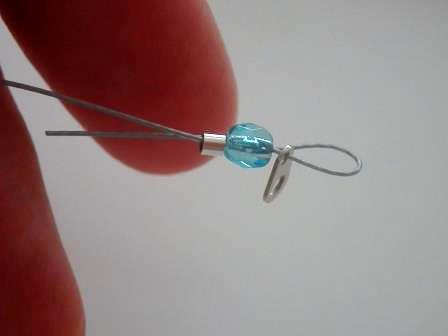
Cinch up close to the clasp, but making sure the clasp still moves freely. If the clasp end is too tight it may fray the stringing wire over time.
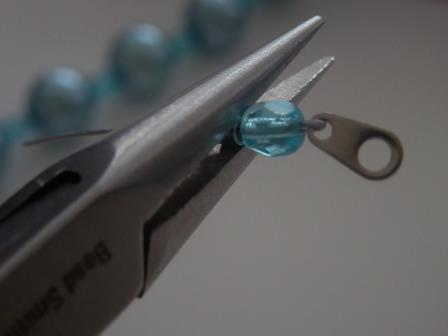
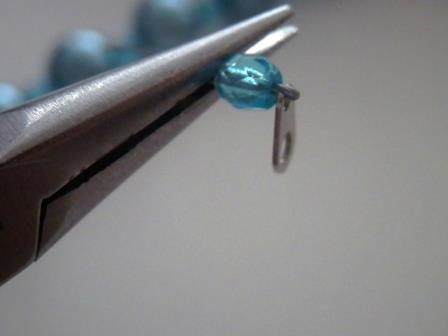
Now compress the crimp flat. Remember the crimp will be the only thing holding the jewelry together.
|
Beading Tip: When using a sterling silver crimp bead vs a base metal crimp bead you will not need to compress very hard. Sterling silver is a softer metal and does not need as much force. |
 |
This will create a flat crimp. If the crimp should break then it was either a defective crimp or a sterling crimp was compressed too hard. If so then just start again. Better to find out now during this process.
Move all beads down making sure to cover the excess wire tail. You should not need anything more than 1" of wire tail. This just adds an extra quality to the jewelry.
Step 4: Close Other End
Remove bead stopper.
String crimp, small bead and other end of clasp as before.
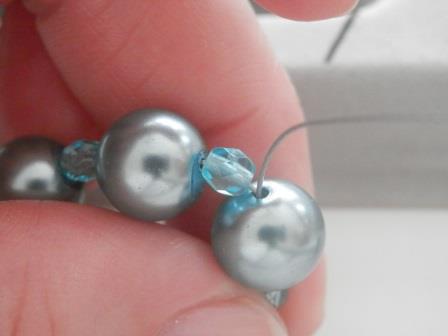
Carry the stringing wire back through the small bead, crimp bead as before, but on this end also string through the first two beads on the end of your pattern.
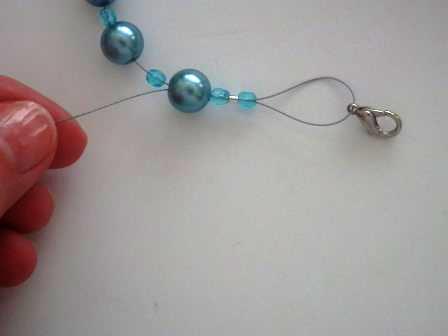
Pull the strand of beads together.

Inspect and make sure it is all together before compressing the second crimp.
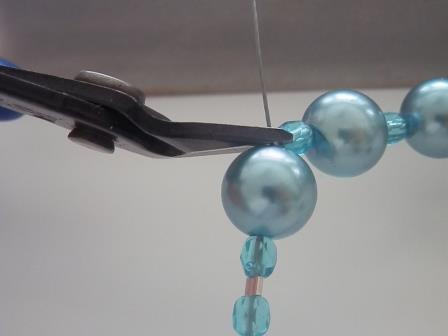
As you prepare to compress the crimp bead make sure only the crimp bead is inside of pliers nose, anything caught will get damaged. This is the advantage for using the slim tapered chain nose pliers for this process.

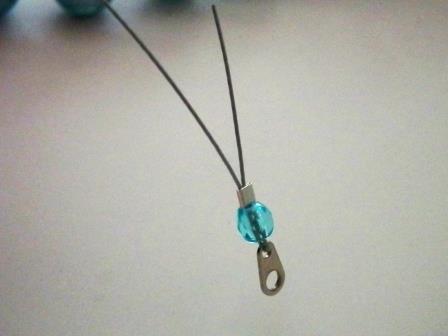
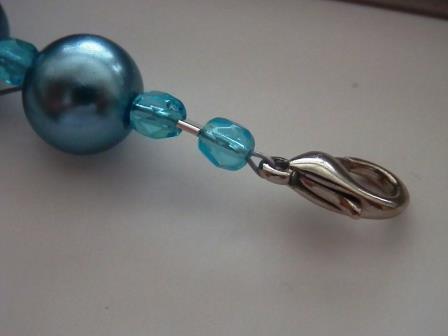
Compress making a flat crimp.
It should look like this.
Test the strength of the crimps. Holding the attached clasp and the opposite end, pull against itself checking to make sure the wire does not slip through the compressed crimp.
Step 5: Clean Up
If the compressed crimps passed the strength test then prepare to clean off excess wire.
Snip excess wire with wire cutters as close into the bead as possible being careful not to cut the main stringing wire.
Step 6: Celebrate
You have just completed your first necklace.
Congratulations!
How did you do?
Practice always makes perfect.
Now that you have completed your first crimping project hopefully this has helped you to see the concept of the basics to stringing jewelry.
If you are ready to move on then let's get started with My 1st bracelet.
That will unveil a few more tips with getting a good bracelet fit, remember bracelet sizes vary for each person.
See you there.

Available Now at Amazon.com

The step by step book that shares a quick path to begin your beading journey.
Use 3 tools and 2 techniques to take you from beading nothing to beading something.
Bead At Home Swag
"My Birthday Rocks!"

This and more available now at Bead At Home Store
Recent Articles
-
Inspire Jewelry Making Ideas
Aug 16, 21 08:46 PM
 Inspire jewelry making ideas with 5 ways from day to day life just by opening your eyes and looking around you.
 -
Scrabble DIY Jewelry
Jul 09, 21 03:33 PM
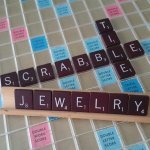 Scrabble DIY Jewelry celebrates Scrabble Day April 13 with easy to make jewelry.
 -
What is Beading?
Jun 23, 21 02:13 PM
 What is beading? Learn and understand different aspects to beading to narrow your search for what you want to learn.
home>my first necklace>beaded necklace tutorial
Jewelry Making Classes Online

- Home
- basic necklace
- Basic Necklace Supplies
- Beaded Necklace Tutorial
This site contains affiliate links to help keep our community free to you. Bead At Home and Beading Jewelry 101 may earn revenue based on affiliate relationships and advertisements with partners including, Amazon, eBay and Google. There is no additional cost to you and it helps us continue to offer this content free to our community. Thank you for your consideration in supporting our efforts.
Copyright© - Bead At Home / Beading Jewelry 101 - All Rights Reserved