Basic Earring Findings
As we learn our first pair of earrings, let's look closer at the basic earring findings.
What are findings? Findings are a category of jewelry making supplies. With earrings, we only need two items and some decorative beads, of course.
Here is our list:

That's it! The assembly process is as simple as the supply list.
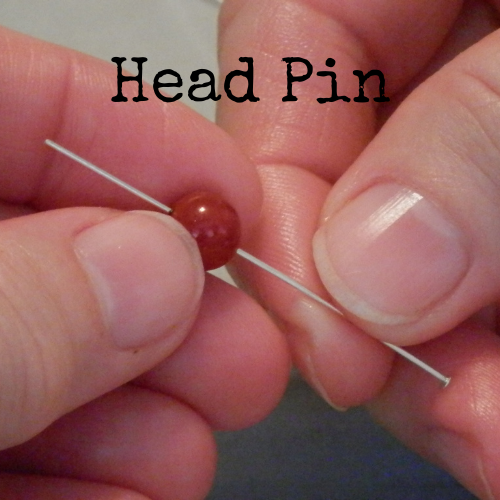
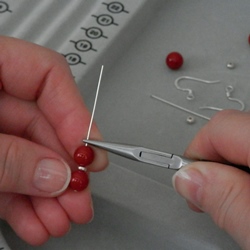
- Step 1) The beads get strung onto a headpin.
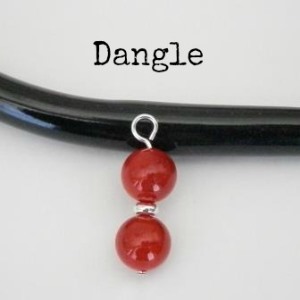
- Step 2) Create a loop at the top of the headpin holding the materials in place.

At this point, you just created a 'dangle.' To convert this dangle to an earring, we add a finding called an 'earring wire.'
- Step 3) The dangle gets attached to the earring wire.

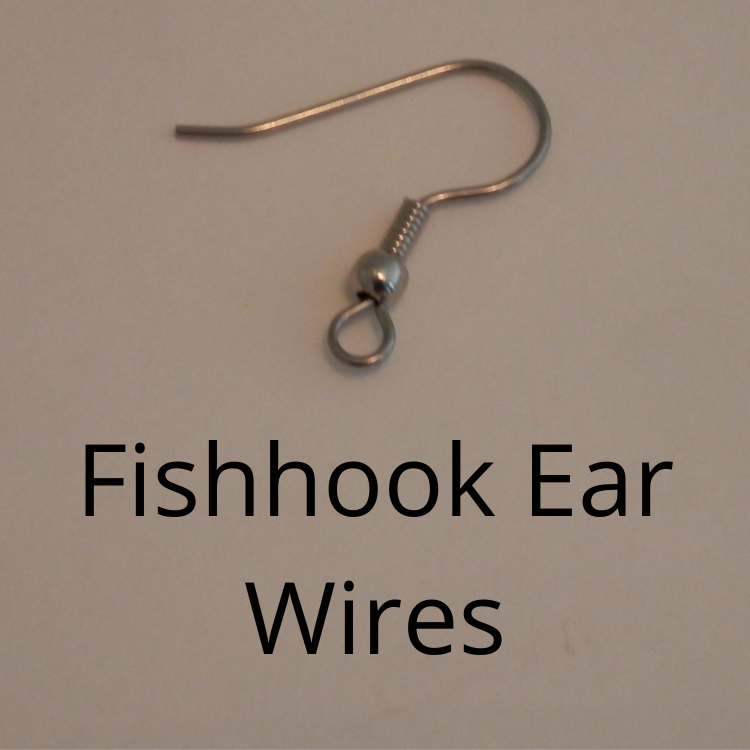
This particular earring wire used here is called a 'fishhook' earring wire.
You just made an earring! Now do it again, and you have a pair of earrings.
That looks simple enough, don't you think?

What if you don't want to make earrings, what if you would rather make something else, maybe a charm. Then you have the choice of adding the dangle to other basic findings creating something completely different.
- Purse Tassel -or- Zipper Pull
- Pendant Necklace
- Linked Bracelet
- Bookmark
- Charms
The list can go on and on just by adding the original dangle to a different finding.
For now, let's just explore the basic earring findings. This will begin your journey to a treasure-trove of jewelry and accessories.
Let's look a little closer at basic earring findings to understand what we shared above.
When making earrings or charms, or pendants, you must begin by making a drop or dangle. But to create a drop or dangle, you will need a finding called...
Basic Earring Findings
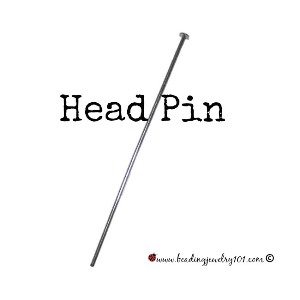
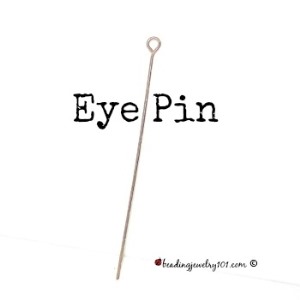
Head Pin -or- Eye Pin
- Head Pin or Eye Pin is a bendable wire that can be manipulated to form shapes.
This type of wire we use for the basic earring findings is pliable enough to shape and manipulate but firm enough to hold its shape based on the wire gauge.
What is gauge? We'll talk about that in a minute.
This pin-shaped wire has either a head or eye on one end. This keeps the materials from falling off. The purpose of the headpin is to create a stopping point. The goal for an eye pin is to create a link that allows the option of continuing the design to other dangles.
We will look at this a little later on in our lessons, but first, let's understand a bit more about the wire in the head and eye pins.
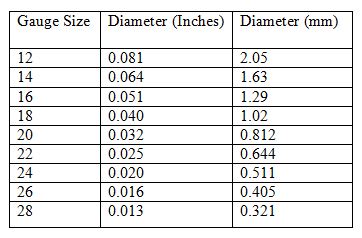
Sculpting Wire Gauge Conversion Reference Chart
This flexible crafting pin wire is generally measured in diameter. The diameter size is listed most commonly by gauge and typically found as even numbers [20, 22, 24]. It may also be measured by mm. It will be essential to learn how to read both as you begin to buy materials. Let's look at a helpful chart that will help you understand the difference in wire sizes available.
Wire Conversion Chart
Look at this chart. The first column lists the different gauge sizes of this crafting wire. You will notice the larger the stated gauge size, the thinner the wire will be. It is vital to make this note. These pins are found in various gauge sizes, but it is best to use 20 gauge for the wire to hold its shape for the single plain loop. The thinner wire will need a wrapped loop for stability (that is another lesson).
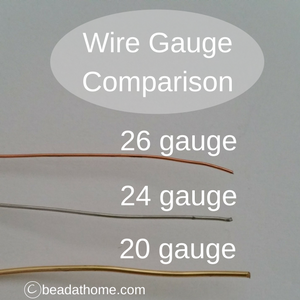
Learn to tell the difference in wire thickness here in the beginning. This will help you in the long run.
This handy tool called 'Bead Oracle Card' from The BeadSmith will help keep this chart and other useful information at your finger tips.
A gauged wire is sold either pre-packaged as pre-cut pins.
You can also find gauged wire sold on spools, but this is not the same wire used to create necklaces and bracelets as discussed in 'My 1st beaded necklace' or 'My 1st beaded bracelet'.

Beading Tip:
When shopping for wire remember soft flexible beading wire, used for necklaces and bracelets, is measured in strands.
This stiffer wire, intended for sculpting loops, is measured by gauge.
Learning to read supply labels properly will save you the headache of buying the wrong materials.
You must be careful not to get the gauged wire mixed up with soft, flexible beading wire packaging. The packaging may look the same or seem similar but let us assure you, it is not.
The pre-cut pins can be found in different lengths, generally between 2" to 4". Depending on where you buy your pins will determine how you need to understand the measurement. Each supplier labels differently, so it's essential to pay attention to the difference between gauge and diameter, both mm and inches.
Refer to the chart above as you begin to shop for these pins. It will help you learn the difference to be ready when reading your supplier's descriptions of the product.
Beading Tip:
Not all beading suppliers descriptions are created equal.
Let me repeat my advice from above;
Learning to read supply labels properly will save you the headache of buying the wrong materials.

The next basic earring finding we are about to discuss is what turns the dangle into earrings.
Earring Wires
- Earring Wires are the components worn in the ear and are made of metal, either a base metal or precious metal available in various styles.
Shapes and styles will vary. These are just two examples of different styled earring wires for pierced ears.
Fishhook Earring Wire
Lever Back Earring Wire
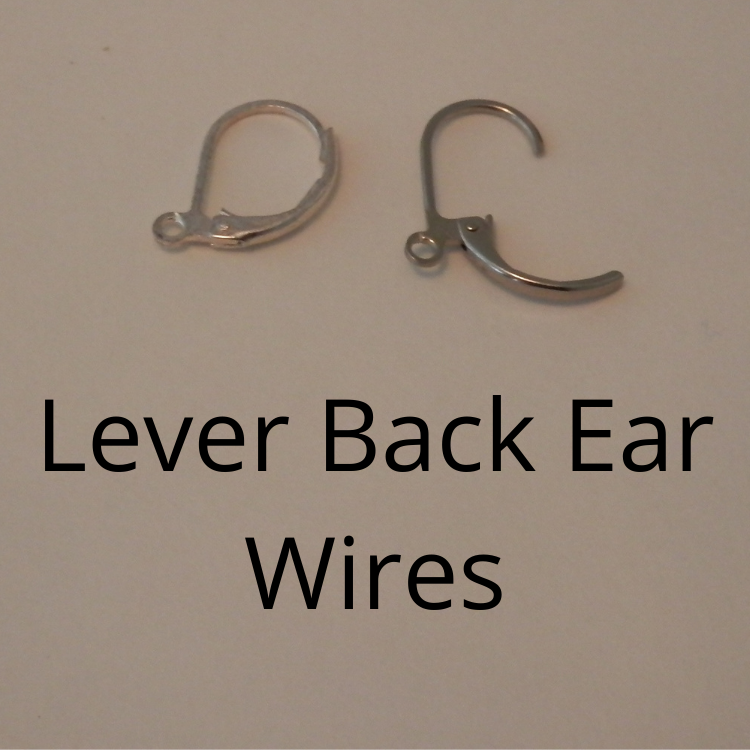
You will find colored metal earring wires as well, such as gunmetal, bronze, or an assortment of pretty punchy colors.
Earring wires can also be purchase for either pierced style or clip-on style.
You will also have the option of a dangled earring or a post earring for both pierced and clip-on. You see there are lots and lots of options. [have we said that before?] If making earrings is not your thing, we'll discuss other options as we get further into making jewelry and accessories.
Learning to make earrings is not the necessity. Learning the technique of making a single or plain loop is. It is used in so many other applications than earrings that you will find this a convenient method. Earrings just happen to be the most commonly found using the single or plain loop.
So we'll look at other findings in the jewelry making classes and jewelry findings beyond the basics. One additional finding item not listed above but a helpful finding easily used in earrings, bracelets, and necklaces...
Jump Rings
- Jump Rings are a circled component made of metal, either base metal or precious metal. They are a general type of finding with lots of uses. Their primary purpose is to connect items together.
Jump rings are convenient to have in your stash, and I would encourage you to have a few. They are not limited to just earrings but can be used with necklaces and bracelet designs as well.
The picture here is an example of using a jump ring connecting several drops to create a pair of dangle earrings on fishhook ear wires.
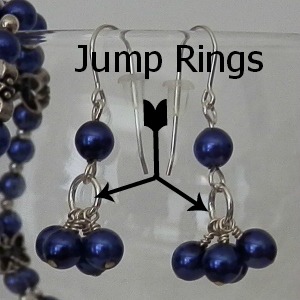
Jump rings are most commonly made of wire, either base or precious metal, in various shapes, sizes, and colors. But most commonly, jump rings are found as either circles or ovals.
Most jump rings have a slit for the convenience of opening and closing the circle. Still, some jump rings are soldered shut, in which case they must be connected using a different method.
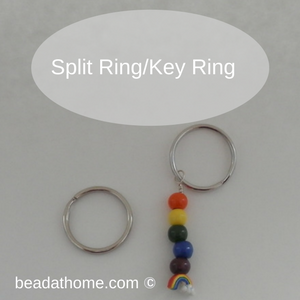
There is also a different type of connector similar to a jump ring called a split ring, a double jump ring created from a continuous strand of wire.
You know them best as key rings.
Remember, if some of these words are new to you, visit the bead terminology to familiarize yourself with this unique jewelry jargon.
Last on our list of basic earring findings will be the most obvious...
Beads
- Beads are the eye candy for all your jewelry projects.

Beads come in various shapes, sizes, colors, textures, materials, and the list goes on. It would be too much if we covered it all right here.
The basics to beads are the place to discuss this. We delve into an introduction of beads, and it's a quick read. Then come back to this spot, and finish working through our process.
Earrings and accessories are great ways to use up odds and ends of beads leftover from larger projects that are now growing your bead stash.
Skip on over and read the general overview to give you a feel for the assortment and variety that awaits you when selecting beads for your earring and accessories projects.
In Conclusion
The selection of findings can seem overwhelming and endless. If you start with these basic supplies listed here, you will be fine for your first beginner projects. As you progress through and start moving beyond the basics, more and more findings will be introduced, discussed, and examples provided for your convenience.
If you take this process, you will be ready as long as you do not jump too far ahead. There is a reason for this specific step-by-step.
There is time to learn about all the basic earring findings plus so much more, but in their own time, as each new project is introduced. So keep moving forward with me. We're getting there.

What to do Next?
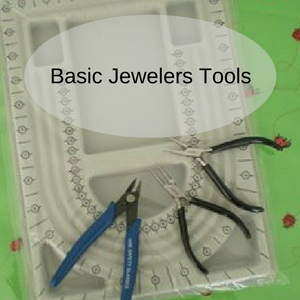
Now that we have worked through the basic earring findings, let's move on to the basic jewelers' tools, if you haven't been there. Once you are familiar with the proper tools, you'll be ready to start your first project with the earring beading tutorial.
If at any time you have any questions or need more guidance, feel free to reach out. We all had to start somewhere.
Ready? We'll see you on the next page.

Available Now at Amazon.com
The step by step book that shares a quick path to begin your beading journey.
Use 3 tools and 2 techniques to take you from beading nothing to beading something.
Bead At Home Swag
"My Birthday Rocks!"

This and more available now at Bead At Home Store
Recent Articles
-
Inspire Jewelry Making Ideas
Aug 16, 21 08:46 PM
 Inspire jewelry making ideas with 5 ways from day to day life just by opening your eyes and looking around you.
 -
Scrabble DIY Jewelry
Jul 09, 21 03:33 PM
 Scrabble DIY Jewelry celebrates Scrabble Day April 13 with easy to make jewelry.
 -
What is Beading?
Jun 23, 21 02:13 PM
 What is beading? Learn and understand different aspects to beading to narrow your search for what you want to learn.
Jewelry Making Classes Online

- Home
- My 1st Earrings
- basic earring findings
This site contains affiliate links to help keep our community free to you. Bead At Home and Beading Jewelry 101 may earn revenue based on affiliate relationships and advertisements with partners including, Amazon, eBay and Google. There is no additional cost to you and it helps us continue to offer this content free to our community. Thank you for your consideration in supporting our efforts.
Copyright© - Bead At Home / Beading Jewelry 101 - All Rights Reserved